Craft Projects, Dollar Store Crafts, Holiday, Valentine's Day

Hot Pink Valentine’s Day Boa Tree

Valentines Day Boa Tree

Need an inexpensive, cute Valentine’s Day decoration for the upcoming holiday? Why not make a Valentine’s Day tree!?

OK, I know trees are usually just for Christmas, but just follow along with this one because the end result is pretty darn cute.

Supplies:

  • 1-2 boas from the dollar store
  • 1 cereal box
  • Hot glue
  • Tape
  • Embellishments (ribbon, chain, etc.)

Step 1: Cut your cereal box down to one panel.

Valentines Day tree - box

Step 2: Fold your cereal box panel into a cone shape and tape the heck out of it so it keeps the shape. This becomes the base for your tree. You can’t see the tape through the boa, so feel free to use however much you need.

Valentines Day tree - cone

Step 3: Trim the edge of the cone to be flat. You will have a lot of excess from the cereal box, so it is OK to cut a lot off. Cut it to the size that you would like your tree. I only had one boa, so I made a small tree. If you have additional boas, your tree can be taller.

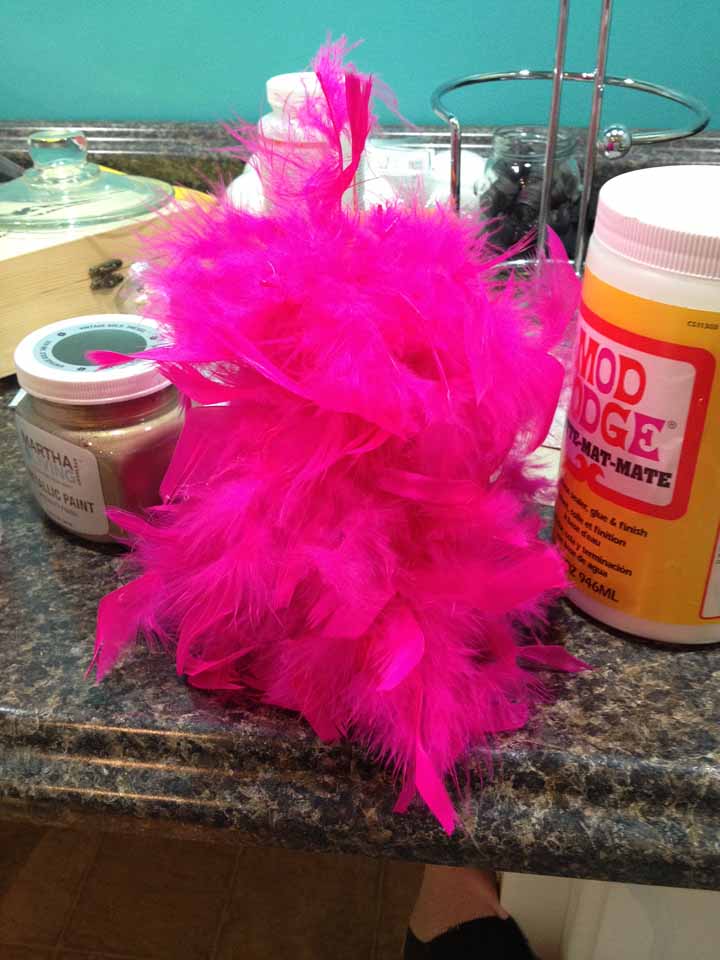
Step 4: Starting at the top of your tree, hot glue your boa to the cardboard. Boas usually have small finger holes at each end that are made of rope. I put this little ring around the top of the tree and glued that on first.

Valentines Day tree - glue

Step 5: Start winding down the tree with hot glue and boa. When you get to the bottom, cut a small slit into the bottom of the cardboard base and place the other knotted finger loop in the slot. Hot glue it in place to secure the boa on the tree.

Valentines Day tree - boa

Step 6: I stuffed the base of my cone so it was a little sturdier. To do so, I spiraled hot glue in the cone and put two crumpled up paper towels in the cone.

Step 7: Embellish. I added a silver chain, black ribbon and a black bow to my tree.

Valentines Day tree - bow

Step 8: Display in your house for everyone to see. Mine’s on our mantel right now and I love it. It looks half tree, half little pink monster hiding behind our wedding photos.

Valentines Day tree - mantel

Come Christmas time next year, I want to make several of these trees using white boas. I’ll probably make them in varying heights. How pretty would that be?

Happy friday and have a great weekend! Got any good plans for the holiday weekend? It’ll be visiting with family and lots of football at our house.


Craft Projects

Pallet Bar Sign

Remember this sweet pallet I scored from work? I got a lot of use out of this bad boy, making two different jewelry holders, one with knobs and one with spoon hooks.

But, what I’m about to show you is the pièce de résistance from my first-ever pallet — a BAR sign for, yes, our bar!

To make my sign, I had to demolish the pallet. I got out my handy-dandy jigsaw and cut out the middle planks to use. I decided to make my sign with four planks, and an additional plank as support along the back.

Once my pieces were cut (I cut one of the planks in half for the back), I lined them up outside and nailed them together using my nail gun. I didn’t want the edges to be perfectly even, so instead I lined up the four planks by the nail holes down the middle. This gave it a nice look.

First, I nailed the wood into the back supports from the front of the sign. Then, for added support and more nail gun fun, I flipped it over and added nails down the supports in the back.

Then, I got out my sander and sanded the edges down and the front and back down. I picked pieces with holes and knots on purpose, so I made sure to leave those spots alone.

With the sign all smoothed out, I brought it inside to begin taping out my letters. Using painters tape, I blocked out the letters “B,” “A,” and “R” at varying heights along the sign. I did this all by eye (no tracing, no stencils), which took a long time (about an hour) and a ton of patience, but was worth it in the end.

Then, I got out some of my remaining paint samples and started to fill in my letters. For the “B” I used Behr Smoky Slate, for the “A” I used Behr Contemplation, and for the “R” I used Behr Lime Light. I’ve gotten so much use out of these samples, it’s crazy! Anyway, I chose these colors so the letters would have a subtle ombre effect to them.

Once the letters were painted, I removed the tape — the paint was still wet, so the tape came off perfectly! Then, I set the sign aside to dry.

Afterward, I got out some leftover gray stain from my coffee table project and stained the entire sign. Yes, I did go over the paint. I let the stain sit for about five minutes, then wiped it off and let it dry. I came back a few hours later and gave the sign two coats of poly. I also attached heavy-duty picture hangers to the back before letting the sign dry overnight.

We hung up the sign last night right behind our bar and it fits perfectly! I’d pretend that I did that on purpose, but it was just dumb luck! Still, I’ll take it 🙂

{A Smith of All Trades} Pallet Bar Sign

Um yeah, I ❤ my sign. So does the hubby. Total win!

And, best part, it was totally free to make!

Craft Projects

Yarn-Wrapped “S”

Good morning and happy Monday!

I showed you yesterday a quick and easy project my girlfriends and I made at our craft night on Saturday. Today, I’m sharing a not so quick and not so easy project that we tackled last weekend, too.

Inspired by many of the yarn- and twine-wrapped letters on Pinterest, Amy, Carrie and I set out to make pretty letters of our own. I made an “S,” Carrie an “H” and Amy a “T.” … we were one letter away from, well, use your imagination.

Anyway, instead of buying cardboard letters we chose to make our own to save some mulah. So, we destroyed several of Amy’s cereal boxes (her hubby was wondering why all of their cereal was in bags on the counter) and made letters of our own.

First, we traced letters onto the boxes, then cut out two of each letter.

Next, we cut thin strips of the cereal box and used them to create a 3D letter. We taped the thin strips all around on of the letters, before taping to top letter on top.

Mmmmm… Raisin Bran.

Once our letters were finished,  it was time to add our yarn and twine. I chose to wrap mine in a brown yarn with a little sparkle to it. Amy and Carrie wrapped theirs in twine. To start mine, I taped it onto the back and started wrapping. A couple of pieces of tape in, I realized two things. One: I needed hot glue, and two: I needed something to cover the tips of my “S.”

I cut out two small rectangles of fabric to glue on each tip of the letter, then continued wrapping and gluing yarn around and around and around. I used almost the entire ball of yarn — holy cow.

Hours later (yes, hours), I finally finished wrapping my letter. I think between the cardboard construction and the yarn wrapping, it took me about 2.5 hours.

Looking good, huh? Time to embellish. I whipped up a cute, fabric flower and a couple of leaves to glue to the letter.

Done!

Carrie had to go home before embellishing her flower, but Amy’s “T” got blinged out 🙂

So cute!? Just like her pup, Stover, who kept us company all night.

Once I got home from craft night I showed my finished product to the hubby — he was super impressed. Instead of hanging the letter up on a door or a wall, I put it on a shelf in our family room. It looks like it was meant to be there.

So what do you think? Will you be making a cereal box letter any time soon? I’d do it again!