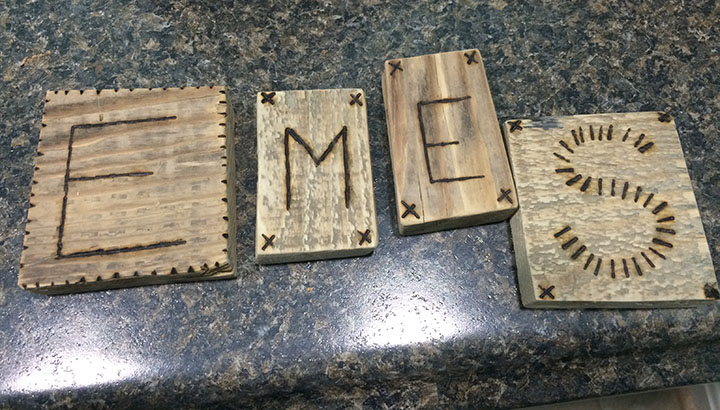
Craft Projects, Pallet Projects

“Love” pallet signs

My girlfriends and I hadĀ a craft night last weekend and made small pallet signs.

Love sign_Jess

Here’s the gist of how I made the signs (I had to make 3 in half an hour, so no pictures):

  1. Cut the wood off of the pallet using a reciprocating saw
  2. Line up the wood you want to use as the front of the sign face down, then place two pieces of wood perpendicular as the back supports
  3. Screw or nail in the supports
  4. Using a circular saw, trim the edges of the signs so they are straight
  5. Sand down the sign
  6. Add picture hanging hardware to the back

I’ve made pallet signs before, so if you’d like more detailedĀ steps on how I constructed the actual sign, check out this post.

{A Smith of All Trades} Pallet Bar Sign

The only difference was my nail gun wasn’t working, so I screwed in the back supports instead of nailing them in.

Carrie found an adorable “Love” sign on Pinterest that we decided to do our own take on. We painted the signs using mint and metallic gold paint. The gold paint didn’t show up well on the pallet, so we covered the whole sign in stain to help the paint pop.

Here’s what we came up with:

Carrie’s Sign:

Love Sign_Carrie

Amy’s sign (she wrote “my heart” in Gaelic):

Love Sign_Amy

And my sign:

Love Sign_Jess1

They are so stinkin’ cute! I’m not sure where I’ll put mine yet — I was thinking in our bedroom, but it isn’t that big so I don’t know if it will look right on any of our walls. I’m also toying with adding it to a gallery wall I’ve been working on for months. I suck at putting gallery walls together and never seem to get them quite right. Plus, I always seem to hang the same photos over and over. So I want to rework the gallery with art in it, so this might fit in nicely.

Since I know I want to hang it up, I added picture wire to the back. I also added soft gel pads so it doesn’t muff up my walls.

Love sign_back

Another successful craft night! Do you ever craft with friends? What sorts of things do you make? We are always looking for fun ideas.

Christmas, Craft Projects, DIY GIFT GUIDE, Gift Idea, Holiday, Pallet Projects, Quick and Easy Crafts

Wood Burning and Wooden Ornaments

My last holiday craft involving pallet wood also involved a new skill — wood burning!! I’d never successfully tried wood burning before, but I figured out what I’d been doing wrong and had a blast playing around with the new technique.

Before I got into the wood burning, I simply was making trees from the pallet wood. The first I made was a gift for my secret santa at work:

PalletTreeOrnament

I cut out the tree using my jigsaw, sanded it down, added a hole for the ribbon and colored the wood using the restor-a-finish product I always rave about. Cute, yes? My coworker loved it. I also gave him a Home Depot gift card — he and I love to chat about our ongoing projects. He’s my Home Depot buddy!

I made a similar tree for my godmother, but to girl it up a bit I painted gold dots all over it to look like ornaments.

Then I moved on to some simple wood burned ornaments. I tried it out on some scrap wood first:

Scrap Burning

After doing some research online, I learned that you can use a soldering iron as a wood burning tool. The only downside is the lack of interchangeable tips. I’d tried this before, but it turns out I didn’t let my iron get hot enough. This time I let it fully warm up — and that did the trick.

Once I’d tested it out on a few pieces of scrap wood, I started to make gifts for people. An “E” for the neighbors, an “S” for my mother-in-law and an “M” and “E” for Max and Eli, my friend’s sons.

Wood Burned LEtters

Let me back track for a sec — all of these are from scrap wood, which I liked a lot because pretty much none of my pallet went to waste. I sanded everything down before burning it.

OK, back to the burning… once I got designs I liked, I added holes for ribbon or wire. Some I stained, some I left natural.

MEandMax

My buddy Maz really liked his little “M.” OK, he obviously couldn’t care less about it… I just wanted to share our selfie šŸ™‚

The letters I did were fairly easy (Minus the “S”) because they were all straight lines. Since my soldering iron was a longer flat tip, that was the only shape I could do. Lots of dashes, exes and straight lines.

I got the idea to use those shapes to make wood-burned Christmas tree ornaments. These were my favorite.

Small Tree

Large Tree

If you smell them, they smell like campfire! LOVE.

I gave my sister and her BF the larger ornament with the star. The other I selfishly kept for us. I added a lumberjack-esque ribbon to it, too.

Tree_Ribbon_Final

How adorable is that? It it cost me $0! The wood was scrap, the wire I add and the ribbon came off of a gift šŸ™‚

Tree_Ribbon_On Tree

I love to make Christmas gifts and I think these were some of my favorites that I made this year.

Christmas, Craft Projects, Holiday

Wooden Tree Decoration

One of my favorite gifts that I made this year IĀ of course failed to take a nice picture of. Just my luck.

I made my godfather a decoration of trees and a graphic design print with lyrics from his favorite song, In the Bleak Midwinter.

BleakMidwinter

The print is simple and has the first verse of the song. I wanted to create a decoration to sit beside it, so I used pallet wood to create a tree scene.

Tree cutouts

First, I cut out pallet pieces using a jigsaw. I didn’t care for the lines to be perfect, so you’ll see that the trees aren’t all straight or the same size. Imperfection is the name of the game.

Once my trees were cut out, I sanded them down and laid them out in a way I thought looked pleasing.

Stained trees

I pulled a piece of scrap wood from my stash and cut it down to size. I wanted just enough behind the trees to help the whole decoration stand on its own.

Lined up trees

Next, I stained the trees. I used a darker brown stain and a light green stain, choosing to leave the tree in the middle untouched.

Once the stain dried, I screwed the piece of scrap wood into the trees so they would be permanently affixed together.

Last, I used a small piece of scrap wood to create a star — I wasn’t able to cut a star out of wood, but instead stained an itty bitty piece of wood yellow and used a wood burning tool to add a star. I added this to the center tree only.

Ta da!

Final trees

Like I said — not a good picture. It really doesn’t do this decoration justice. My godfather loved his framed graphic art and the accompanying tree decoration. I almost didn’t want to give the trees away!