Craft Projects, Holiday, Valentine's Day

Love Birds

Red love bird

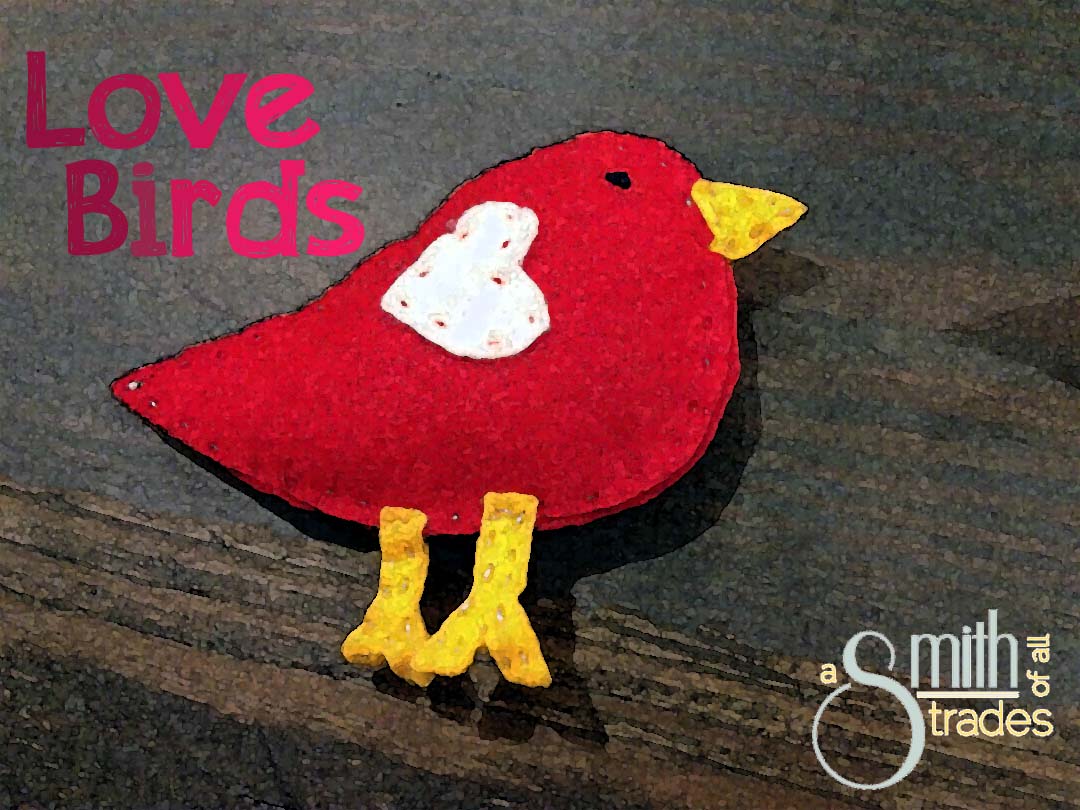
I love birds and I love Valentine’s Day, so naturally I would do a bird-themed craft project for the Feb. 14 holiday. While Valentine’s Day is still a month away (a month to the day today!), I wanted to get started early on the few projects I have planned so the decorations can be out an about for a bit. I only have one Valentine’s Day decoration — a cute wreath my step mom made me — so I need just a few more things around the house.

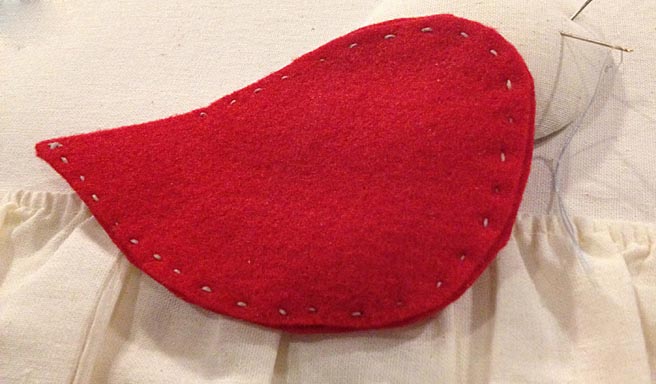
As I sat down to watch the football game last night, I got out my sewing kit and a few pieces of felt. To start on my love birds, I cut out two pieces to make the body.

Love bird project

Then, I starting stitching around the outside of the body.

Love bird project2

I doubled up the thread so it would show more on the stitching.

Love bird project3

I kept stitching all the way around the body until there was a small slit open by the tail. I stuffed the body using some leftover batting.

Love bird project4

Love bird project5

Once it was all stuffed, I sewed the remainder of the body closed.

Love bird project6

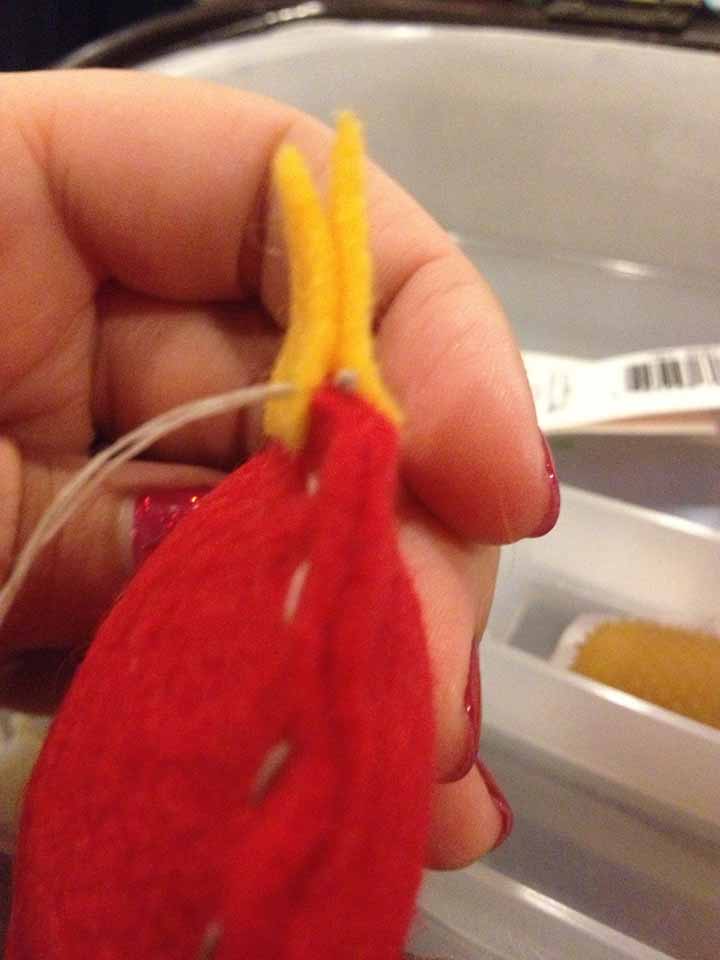
Time to add the rest of the pieces! I cut out a beak, wing and feet, and sewed each piece to the bird.

Love bird project7For the wing, I used a heart!!!

Love bird project8

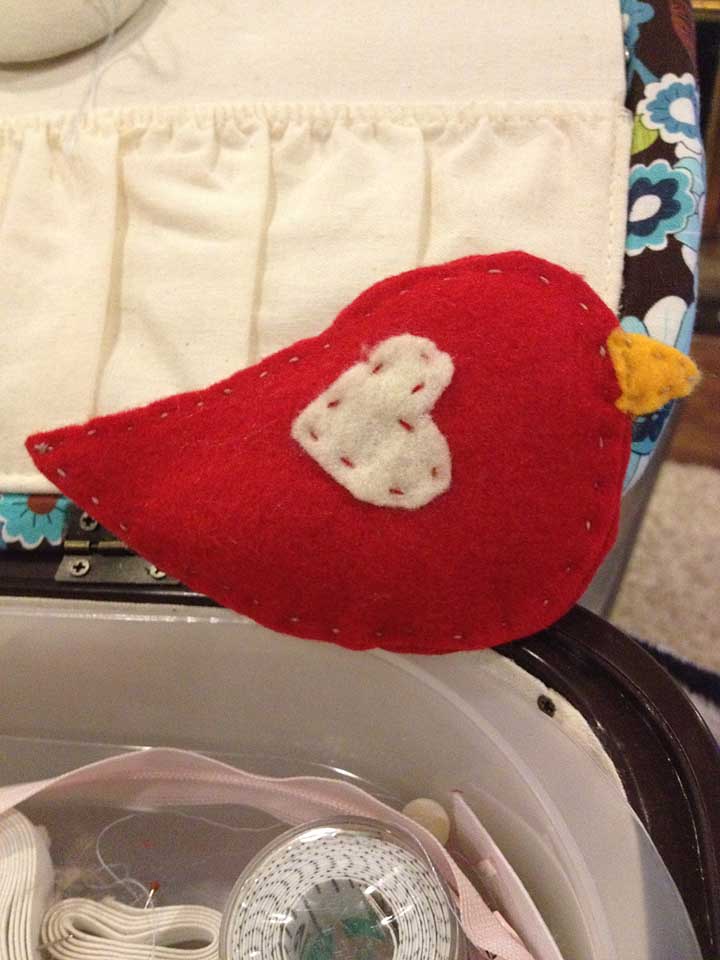
Lastly, I added an eye using thread.

The red bird is for my hubby. Then I made a white one for me! For the second bird, I sewed all of the extra pieces on first. … the beak, the wing, the feet and the eye. That was a lot easier.

Love birds

We have the cutest love birds. ❤

All in all, it took me less than two hours to make these two love birds. Now they are sitting on our mantel — the first of the Valentine’s decor for our house.

Love bird project Mantel

L.O.V.E.

Christmas, Craft Projects, Holiday

Painted Salt Dough Ornaments

Remember the salt dough ornaments from Sunday? Well, if not, let me refresh your memory.

BAM!

IMG_2205

Carrie, Amy and I made a bunch of these ornaments at our last craft night of 2012 and I hung a few on my tree right away. I also saved a bunch to paint. And, amazingly, I painted all of them on Tuesday night after work! I guess when no television shows are new it’s much easier to motivate yourself to work on crafts.

I broke out my Martha Stewart metallic silver paint that I used like a crazy person this summer (silver mirrors, silver chests, silver everything!) and a teeny tiny paint brush and started to paint different ornaments. I made three snowflakes out of the silver, adding ribbon to hang them on the tree by. I also painted a few with reds and greens. I painted a lot of ornaments last night.

IMG_2328

I accented this snowflake with red dots using the tip of a small nail head.

IMG_2310

Then I painted this little mitten. So cute!

I’d show more, but they are all gifts for people who might be peeking! You get the idea anyway.

One last thing… if the world ends tomorrow, nice knowing ya! 😉 Happy almost Mayan Apocalypse and happy Thursday.

Christmas, Craft Projects, Holiday

Ribbon Ornaments

I’ve been really into making ornaments for our tree lately, and here is one inspired by le pinterest.

I saw an ornament on pinterest that was a Christmas tree made out of ribbon. I ran out of green ribbon after making labels for my applesauce, so my first attempt to make the tree failed miserably because the ribbon was too short. So instead, I made a flouncy ornament out of white ribbon that is pretty just the same.

To start your ornament, find a charm or a bead that you can hand from the end and secure it to a thin piece of wire. You don’t want a wire that is too thick or it will be touch to get it to pass through the ribbon.

IMG_2231

Once you have your bottom charm secured, fold your ribbon into a point and pierce it with the wire. Immediately place a bead onto the wire to hold the ribbon down.

IMG_2232

Then, in alternating lengths, fold the ribbon and pierce through the middle of the fold. Do this a couple of times, and then add a bead.

IMG_2233

Continue until you have a shape you are fond of. If you use green ribbon, you might want to start big on the bottom and get small as you work your way up.

I started with smaller folds, then allowed my folds to get larger in the middle, then small at the top again. I really like the shape it created.

When you are finished with your ornament, fold the ribbon again (so it wont fray) into a point and piece it through the wire on last time. Then make a loop with the wire and wrap it around the base of the loop to tie the whole thing off.

Thread a ribbon or string through your looped wire, and your ornament is ready for the tree.

IMG_1934