Christmas, Craft Projects, DIY GIFT GUIDE, Gift Idea, Holiday

DIY GIFT GUIDE: Frosty the Snowman

Snowman Gift Guide

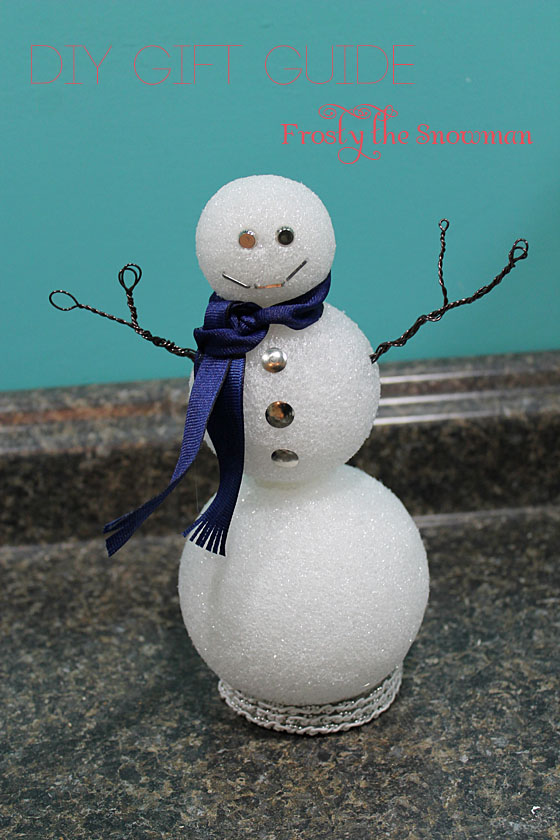
Do you know someone who loves snowmen? Or home improvement? If you do, then this decoration made mostly of home improvement findings would make a fabulous addition to their Christmas decor.

Supplies:

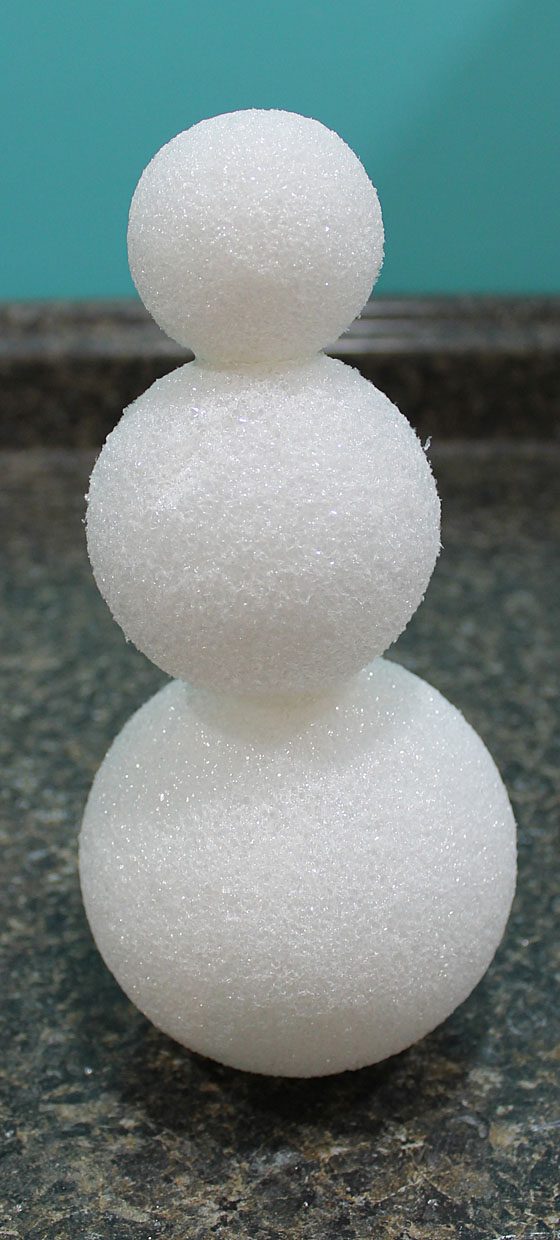
  • Styrofoam balls, three different sizes
  • Pencil
  • Mason jar band
  • Ribbon
  • Two nails
  • Thumb tacks
  • Staples
  • Wire
  • Hot glue

Steps:

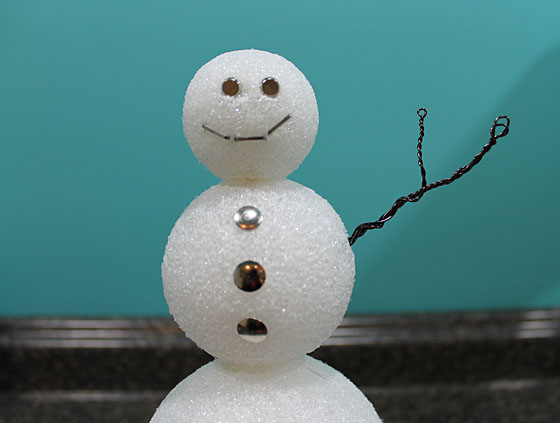
  1. Take the largest ball and stick a pencil in it. Weird, yes.
  2. Cover two inches of the pencil in hot glue, then stick the medium-sized ball on top. Yes, there is a random sock on my craft table. Thank you, Remmy.Snowman Base
  3. Do the same thing for the smallest ball, but do not push the pencil all the way though. This is the head of the snowman. Snowman Body
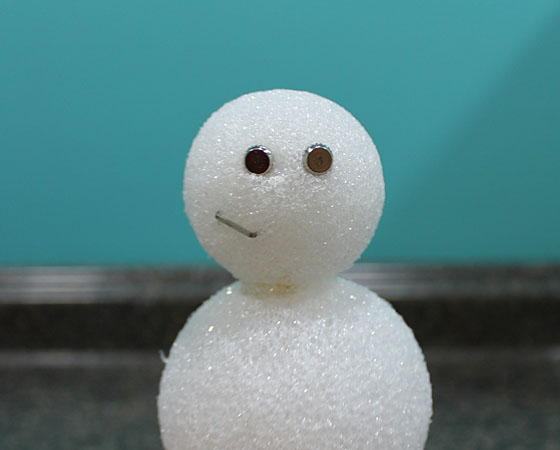
  4. Make a face for your snowman using two nails and a few staples. Stick each component into the styrofoam to secure it.Snowman Face
  5. Once your snowman has a face, add a few tacks along its belly for buttons. Place a small dab of hot glue under each tack so they don’t come loose over time.Snowman Arm
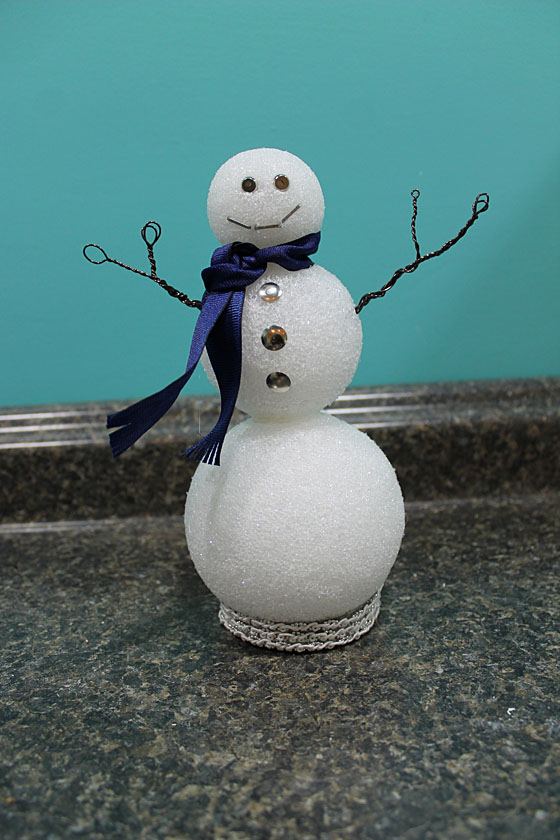
  6. Make arms for your snowman out of wire. Twist the wire until you have two long pieces for arms. Stick the pointy ends into the styrofoam. Or better yet, find two twigs to do the job.Snowman Arms
  7. Tie a piece of ribbon around the snowman’s neck. Cut the ends to the length you prefer, then “fray” the ends with tin scissor cuts. I added No Fray to mine.Snowman Scarf
  8. Take the mason jar band and line the rim with hot glue. Press it onto the bottom ball to act as a stand for the snowman.Snowman Stabilizer
  9. Wrap ribbon around the band, securing it with hot glue.Snowman
  10. Display!

Snowman 2

Our snowman is currently on the lookout for snow we are supposed to be getting today. Here’s hoping!

Christmas, Craft Projects, DIY GIFT GUIDE, Gift Idea, Holiday, Quick and Easy Crafts, Wine Crafts

DIY GIFT GUIDE: Cork LOVE Magnets

Cork LOVE Magnets

Day two of the gift guide and what do we have — stamped cork magnets!

If you don’t think these are adorable, well you might be cray cray.

You’ll love how easy peasy this project is. It takes 5 minutes, tops!

Supplies: 

  • Corks
  • Small stamps
  • Magnets (Michaels sells round magnets that are slightly smaller that a cork round. Match made in heaven? I think so!)
  • Ink
  • Hot glue
  • Cutting tool

Steps:

  1. Like in yesterday’s post, carefully slice your corks to about a 1/2-inch thickness. You can use a steak knife, scissors (if the are really sharp) or any other tool you have that might cut through the cork.
  2. Stamp each cork round with your small stamp and ink. It might take you a few tries to get your stamp centered the way you like it. Some of the LOVE stamps looked more like LOVF. Oops.
  3. Place a dab of hot glue on the back of the cork and secure it to the magnet. Let cool.
  4. Stick your magnets on your fridge and marvel at their cuteness.

Love Magnets

Is there a wine lover in your family who would love these!? There are definitely a few people in my family who I think would like them!

Love magnets2

Check back tomorrow for the next DIY gift post!


Craft Projects, Furniture, Jewelry

Jewelry Box reveal… finally!

How sad is it that I’ve had this project complete for months and still haven’t shared it!? Very sad.

Oh well! The time has come to share my jewelry box project that took me months to do because I couldn’t decide what the heck I wanted.

Jewelry box before

I found this jewelry box in an antique store for 50% off, so I got it for a steal of $20-some bucks. Some of the jewelry boxes I was looking into buying cost more than $100, so that seemed like a great price.

I wanted to get rid of the gold tone to the wood and the stinky smell in the drawers so I decided to paint the whole think and rip out the fabric liner.

Jewelry box drawers

It’s not that the liner wasn’t nice… it just was horrendous haha. And scratchy! The only really nice piece of jewelry I own is a strand of pearls that my hubby gave me at our wedding, and it would be ruined resting on that. So yeah, it had to go.

Jewelry box white

Once the drawers were cleaned out, I started to paint. And paint. And paint. And paint.

Sometimes I forget how many coats white paint takes to cover. Holy cow. When I was pleased with the coverage, I added a stencil.

Turns out, I am god awful at stenciling, so I messed up the paint job pretty badly. Once it dried, I decided to just distress the whole thing. Good choice!

I stained over the paint and gave the whole thing a coat of polyurethane.

For the knobs, I reused the same knobs that came on the jewelry box. They fit perfectly and I thought they looked nice with the distressed vibe. For the drawers, I lined each with jewelry making mat (after I botched lining it with velvet. That was just terrible).

After months of working on it off and on, I finally finished the darn thing.

jewelry box4

I am in love.

Jewelry box

jewelry box2

So it took me forever to show you, but was it worth the wait?!

Jewelry box finished

I hope so 🙂