Craft Projects

Baby Brother sign

My good friend Carrie is expecting her second son in September and I am so excited for her and family. This baby has been dubbed “baby brother” throughout her pregnancy (her last baby was nicknamed “Kermie”) and she jokes that it should be his actual name.

Using scrap wood from my console table project, I made her a sign for her little one’s nursery using the nickname.

Spare Wood

I pulled out a piece of wood that actually broke off where it was laminated/glued together to the other boards. (Hopefully that doesn’t happen to the larger sheets of wood I used for the tables). I sketched out “baby brother” and then immediately sanded it off because I didn’t like it.

I opted to freehand paint it instead.

Baby

I did “baby” in off-white and cursive.

Painted sign

Then, I painted “brother” in navy and a print handwriting.

I added a few dots of the opposite color to each word as a cute little accent.

Drilled hole

Then, I drilled holes in the top two corners large enough to string rope through.

Before adding the rope, I stained the board with a light weathered gray stain.

Stained word

This really helped the off-white paint pop.

Stained sign

I put the rope through each hole and knotted it so it wouldn’t pull back through, then hung the sign up to dry. Since it will just be hanging on a wall, I didn’t bother with poly.

Hanging to dry

I gave her the sign on Thursday and she loved it!

Baby Brother sign Carrie

I can’t wait to see where she puts it in her nursery and I can’t wait to meet her little boy 🙂

Craft Projects, Quick and Easy Crafts

White and Mint Metal Candle Holder

I really try to like colors that aren’t a shade of blue or green. Honest, I do. I bought a coral/pink candle holder from Target a few weeks ago on clearance that I thought would add a nice pop of color to my living room.

Console In the room

You can see it on the table, pulling the same color from my poppy pillow on the couch.

Console2And again on my console table pulling out the color in the maraca I brought back from our honeymoon.

I like the coral color on both of those pieces, but I hate it on the calendar. Seriously, it is awful. Every time I walk by our living room it jumps out at me. “Ha ha, there’s ugly pink in your rooooooom.”

Well, ugly pink no more.

Pink candle holder

I didn’t want to return the piece since I paid $5. It was a good price and I liked the overall look, just not the hideous color. I taped off the wooden based and, for good measure, a stripe to remain coral.

Then I rushed outside to spray paint the whole thing.

taped off top

Ahhhh, so much better already.

Once the white dried, I pulled off the tape… and still hated the coral. So I sanded down the line left from the paint and did the entire thing in white. I liked it, but thought it needed something special. Something extra.

candle holder sprayed white

So of course I added mint to it. I can’t help it… I just love mint green. And aqua and teal and blue and green.

I then slapped a light stain on the wood base!Finished candle holder

It looks so much better (to me anyway). And now it looks right at home on my new console table.

White and mint candle holder2

No more ugly pink staring at me in the room. I can breathe a sign of relief.

White and mint candle holder

So what do you think? Better before or after? If you are pink people, then you probably think I’m nutso. It was a cool piece to begin with. But if you are like me and coral pink makes you want to tear at your eyes, the after is much better.

Tomato Tally: 120

Craft Projects, Quick and Easy Crafts, Wreath

Another floral arrangement

I got into another floral project the other night that was inspired by the arrangement I made last week and the boring TV show that was on right next to it.

Flowers by tv

Brian was watching Pardon The Interruption, which I actually enjoy during football season but find less interesting in the offseason (Sorry Tony and Mike!). So instead of watching TV, I started admiring my new arrangement. And then I noticed my other arrangement that I’d thrown together a while back on the other side of the room with additional flowers just waiting to be added. What better time than during PTI!?

My vase already consisted of these flowers…

Flowers3

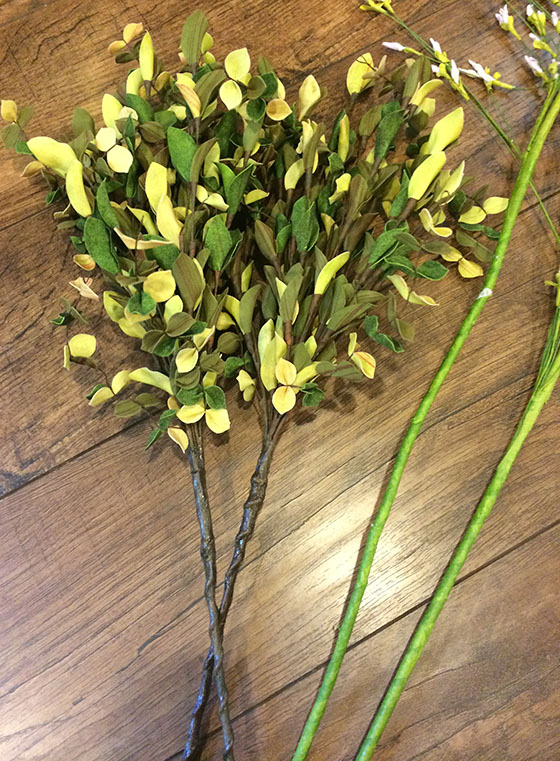
… and these flowers…. err, branches….
Flowers2

… and the flowers on the right. But I wanted to add in the flowers on the left and a few more colorful sprigs of pink and purple flowers (kinda pictured below, and kinda pictured above).

Flowers1

The vase I wanted to use was a clearance score at Michaels. I paid less than $3 for this teal vase.

Vase

The vase is short and the mouth is narrow, but since the base is wide all of the flowers tend to lean to one side.

Much like the other arrangement, I started by cutting the ends of the wire off to shorten each stem. I did random lengths to not everything was the same height. To do so, I cut them with wire cutters/strippers. (Apparently, this might not be the appropriate tool to use since the top circles are used to strip the protective coating off of wire. But the bottom 3/4 inches are used for cutting wires, which the flowers are made of, so I stand by my choice! Plus, it was wayyyy easier than using traditional wire cutters. Ladies, if your hubby looks at you like you are crazy for using wire cutters, just ignore him :p)

Tools

Once all of the flowers were trimmed and re-trimmed, I started to assemble everything back in the vase. I ended up leaving out the accent branches — they have more of a fall color scheme to them anyway, so maybe I’ll be making seasonal arrangements later this year!

Unlike the other arrangement, I didn’t want to add filler to the vase, so the flowers had to stand on their own. When I had an arrangement that I liked, I gathered it up out of the vase and wrapped thread around the base where the lip of the vase would cover. This secured everything together, making the flowers stand tall instead of leaning to one side or the other.

Then, I filled in the opening of the vase with a few short, pink sprigs that weren’t tall enough for the arrangement. They add just a little more color and oomph to the arrangement.

Finished Floral Arrangement

As you can tell, I really like wispy arrangements.

This guy lives on the other side of the room on a game cabinet. It creates nice movement in the room because your eye is drawn from one arrangement to the other. I am thinking about moving the purple arrangement closer to our bar — the vase is filled with corks after all — and creating one more for the television cabinet. We’ll see.

Processed with VSCOcam with f2 preset

Even though I love to garden outside, I am not very good at keeping things alive inside. These fake flowers are a great way to bring the feeling of the outdoors inside without having to remember to water them!