
As promised — new craft project!!!
Remember how I altered my aunt’s beautiful wind chime to match her preexisting one? That project inspired me to think out of the box to create her a final wind chime to complete her set. Both of her chimes are copper with key and crystal accents, and I happened to have a ton of old keys and chandelier crystals in my craft room. What luck!

I set out to make my own wind chime using keys, crystals, wire, chain and an embroidery hoop.

First, I separated my hoop into two pieces. I went outside and hit each side with some copper spray paint to match my aunt’s existing chimes.

Once the hoop was dry, I brought it inside and drilled six holes around the inner of the two hoops. This is where I attached the actual chimes, using the outer ring as a safety measure against the wire getting too much wear and tear.

When the holes were drilled, I started making each strand of the chime. I didn’t want my strands to be even, so I didn’t bother measuring out the chain. For this step, I laid out my supplies: pliers, wire, chain, keys, crystals.

I had two sizes of crystals from a leftover chandelier: Large drops and small faceted octagons. I used the large drops at the end of each chain to give them weight. For keys, I had a nice mixture to choose from. I opted to not be matchy-matchy. I spray painted a few copper, but left others natural.
To get the crystals onto the chain, I took a copper wire and looped it through the pre-drilled hole.

Once the wire was in and trimmed to a good length, I started to twist it around itself, creating a loop at the other end and hooking in the chain. Once the chain was hooked onto the wire, I came back down the wire, wrapping it around itself until the wire ran out.

After the anchor crystals were on, I continued this process up the chain. Crystal, key, crystal, key. I added more keys to some chains, and fewer to others.

Once the chains were created, I attached them to the embroidery hoop using the same method of twisting the wire. When all six chains were added, I added two chains at the top (using the existing holes) to hang the chime from.

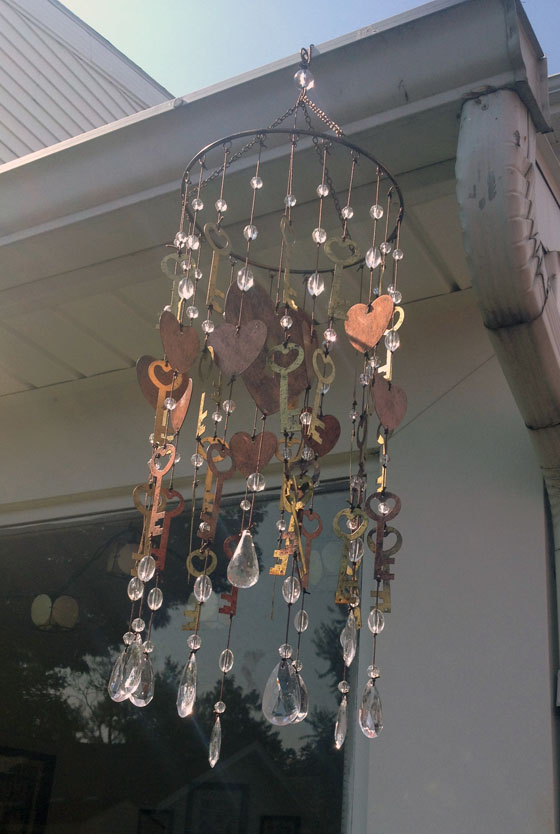
Aren’t the crystals beautiful?!

And I just love the different keys that I added to the chime. They are all so unique.

The chime is so pretty, I almost don’t want to send it off to my aunt. But it will match so nicely.


What do you think? Will you be grabbing your space embroidery hoops and old chain to make a chime? You could make on using beads instead of crystals! Anything would go 🙂

Where can you buy crystals to make these wind chimes?
Hi Ann,
I actually got these from my mother-in-law’s basement! It looks like there are a bunch of places online where you can buy them: http://crystalplace.com/
what are you using to hang it from the tree
what gage of copper wire please?
Hello. Beautiful wind chime by the way! I’m not sure if you’ll get this because I’m not sure how old this posting is. However, if this is current I just have one question. What type and gauge copper wire did you use? I’ve been making crystal chimes and using fishing line but I belive the copper work would be easier.
Thank you in advance.